I first played with this technique when I had a photoshopped picture I wanted to recreate with a friend for a group of friends. Since then, I haven't done it much, since I didn't have a toner based printer readily available, but I changed schools this year and have a toner printer in my office! Yay! I've been playing with some images and making a few things and thought I'd share the process. It's pretty easy, really. First, you need a toner based print. An ink jet print will NOT work. Most office store have toner printers, just be sure before you pay to have prints made that their copier is toner based. You can put as many images on a page as you like and it doesn't matter what kind of paper you use, since you rub the paper off.
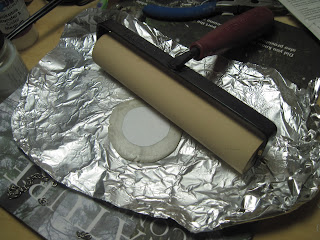
I like to use a pearly polymer clay, but white works, too. I tried doing on on metallic clay, but it came out too dark. After you've got your print, cut out the shape you want, roll out some clay with a rolling pin or whatever you have. I did this on foil, but plastic wrap or a ceramic tile works, too. I used a brayer because I have one. Place the image face down on the clay and roll over it or rub it with a spoon. The contact with the clay has to be secure.
Spray the back of the paper with a little water and start to gently rub the paper. Very soon, you'll feel the paper start to "pill" and roll off the clay. Keep rubbing until you feel no more paper on the clay. It doesn't take long and it doesn't take much pressure.
Let it dry a bit to be sure all your paper is really off. If the image starts to cloud, respray and keep rubbing. Bake your clay as directed on the package and you're done! I cut the final shape after setting the image and smooth the edge with a metal tool or spoon.
Think in advance about what you're going to make and make any appropriate holes. You can drill holes later, too. Make sure you don't make holes too near the edge. Polymer clay isn't very strong.
I use a water-based gloss finish on mine. This image is from a piece of a friend's digital art. I made this piece for her, but it's a surprise, so don't tell her!!
This is a piece I made where I took the flat image and applied it over a shape to make a cabochan-type bead. I'm NOT a great jewelry maker, but this is a fun process. I'm going to try using some of my own art next!


