Friday, April 13, 2012

Polymer Clay Transfer

I first played with this technique when I had a photoshopped picture I wanted to recreate with a friend for a group of friends. Since then, I haven't done it much, since I didn't have a toner based printer readily available, but I changed schools this year and have a toner printer in my office! Yay! I've been playing with some images and making a few things and thought I'd share the process. It's pretty easy, really. First, you need a toner based print. An ink jet print will NOT work. Most office store have toner printers, just be sure before you pay to have prints made that their copier is toner based. You can put as many images on a page as you like and it doesn't matter what kind of paper you use, since you rub the paper off.   

I like to use a pearly polymer clay, but white works, too. I tried doing on on metallic clay, but it came out too dark. After you've got your print, cut out the shape you want, roll out some clay with a rolling pin or whatever you have. I did this on foil, but plastic wrap or a ceramic tile works, too. I used a brayer because I have one. Place the image face down on the clay and roll over it or rub it with a spoon. The contact with the clay has to be secure. 


Spray the back of the paper with a little water and start to gently rub the paper. Very soon, you'll feel the paper start to "pill" and roll off the clay. Keep rubbing until you feel no more paper on the clay. It doesn't take long and it doesn't take much pressure. 


Let it dry a bit to be sure all your paper is really off. If the image starts to cloud, respray and keep rubbing. Bake your clay as directed on the package and you're done! I cut the final shape after setting the image and smooth the edge with a metal tool or spoon. 


Think in advance about what you're going to make and make any appropriate holes. You can drill holes later, too. Make sure you don't make holes too near the edge. Polymer clay isn't very strong.


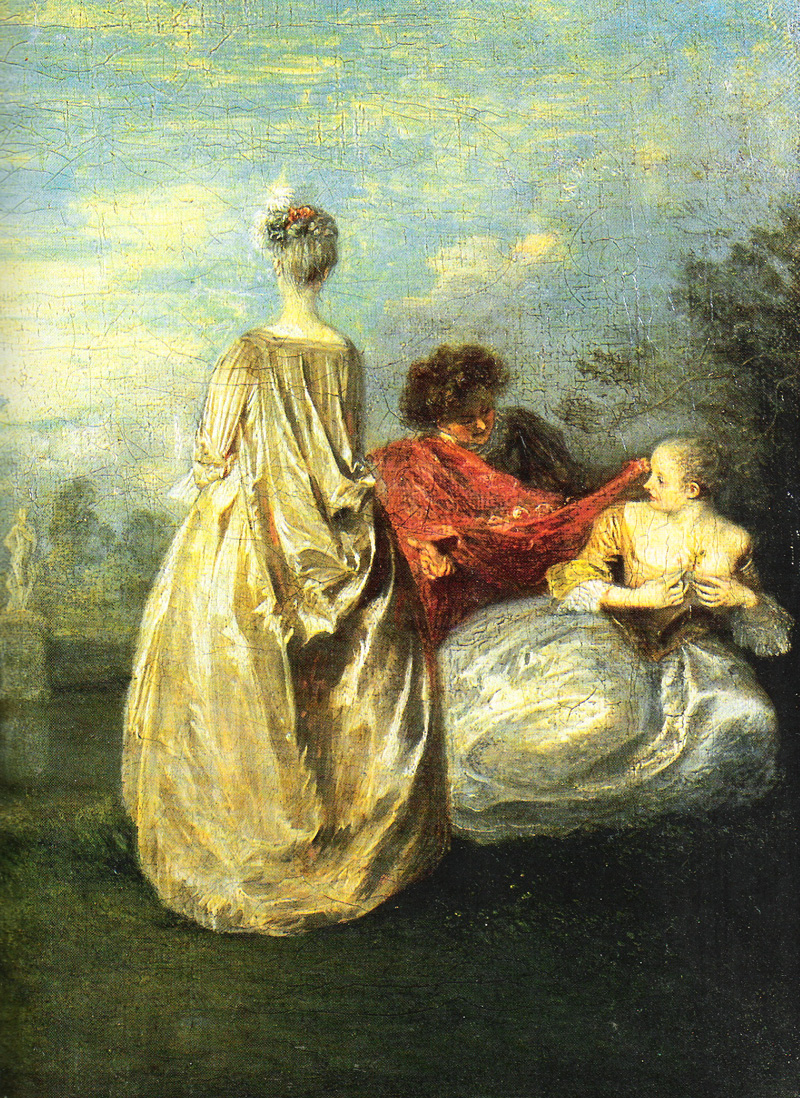
I use a water-based gloss finish on mine. This image is from a piece of a friend's digital art. I made this piece for her, but it's a surprise, so don't tell her!! 


This is a piece I made where I took the flat image and applied it over a shape to make a cabochan-type bead. I'm NOT a great jewelry maker, but this is a fun process. I'm going to try using some of my own art next!


Flora's Pond

From the blog description:
Years and years ago (1988?), I had a dream that I was in a diner in the middle of nowhere. It was called Flora's Pond. The woman who ran the place, Flora, served steaming bowls of primordial soup, which she got directly from a hole in her kitchen floor, where the primordial soup of creation hadn't yet hardened. The soup was known for its rejuvenative qualities. This dream has stuck with me all these years. This blog is my attempt to follow the path that leads me to Flora's Pond, to find what feeds my body and soul.
Throughout the years, I've thought that Flora's Pond would be the name of whatever business I created. It's generally been used to describe my artwork and I tried very hard for a number of years to make a living from art. It never worked out, but still Flora's Pond endures. I've broadened the idea of what the image means to me. My life is not just about art, it's also about food and gardens and teaching and health and green living. Inspiration is to be found at every turn, whether it be a new recipe or a new craft. I have had separate blogs for art and food, but now, I'm putting everything together. It's all part of the spectrum of what makes up my life; it's all part of Flora's Pond.

Tuesday, July 19, 2011

Mexican Kimchi and Chorizo

I can't wait to have these together! I love anything having to do with cilantro and lime juice with some kind of chili. Vietnamese, Thai, Mexican, I love it all! Sally Fallon has a Latin American Sauerkraut recipe in her book, but I switched it up a bit, adding jalapenos, cilantro and lime juice. Here's my version. I used Napa cabbage because I had a lot of it due to a shopping communication error. I'll let you know how it comes out in a few days, when it's a fermented!

  • 1 medium Napa cabbage shredded (about 12 loosely packed cups)
  • 1 cups carrots, shredded (I used more because I got over-zealous with the grater!)
  • 2 small jalapeno peppers, seeded and minced (if you like biting into pieces of pepper, slice them, by all means!)
  • 1/2 tsp red pepper flakes (more or less to taste)
  • 1 tsp dried oregano
  • 1/2 onion, quartered and thinly sliced (again, it's what I had, use more, if you like)
  • 2 tbs lime juice
  • 1/2 cup chopped cilantro
  • 1 tbs sea salt
  • 4 tbs whey, or 1 additional tbs salt
Toss everything together and pound for 10 minutes as described here, then pack into jars.

Chorizo
I found the recipe for this chorizo here. The recipe in my sausage book didn't have any chili, and I definitely wanted more flavor, so I went searching. I used the next to the last one and have reprinted it below. I used a combination of regular chili powder and pasilla chili, which has a wonderful fruity quality. I'm letting it marinate now and will let you know how it tastes when it's done!


Chorizo Mexicano


Serves 8
Ingredients  
     
2  lb Pork; lean, coarse grind
 1/4    lb Pork fat; chop fine
   2    Tbsp   Paprika
   2    Tbsp   Chili powder
   1    tsp   Pepper, black
 1/2    tsp   Cinnamon, ground
 1/2    tsp   Cloves, ground
 1/4    tsp   Coriander, ground
 1/4    tsp   Ginger; grated
   1    tsp   Oregano, dried, crushed
   1    tsp   Cumin, ground
   2    tsp   Salt
   6      Garlic cloves; crushed
 1/2    cup  Vinegar, white
 1/2    cup Sherry, dry (can substitute brandy)
   1      Sausage casing (optional)
  Directions

Combine pork meat and fat thoroughly. Add paprika, chili powder, pepper, cinnamon, cloves, coriander, ginger, oregano, cumin, garlic, salt, vinegar and sherry (brandy may be substituted). Mix well with hands.  
Mixture may be stored in a crock in cool place for twenty-four hours, or better, for 2 or 3 days. Form into patties and saute.  
Alternatively the mixture may be forced into sausage casing and hung to dry in a cool place. This is best done in cold weather and hung in a breezy place help with drying.

Update: The chorizo had too much sweet spice, for my taste. I'd make it again with less sweet and more hot. The vinegar added a nice tartness. I'd also add a tad more fat. I didn't add as much as in the recipe and it was a bit on the dry side. 

Monday, July 18, 2011

Kimchi, Sauerkraut and other Fermented Veggies

Some time ago, when everyone was afraid of the bird flu, it was discovered that eating kimchi could prevent and even cure the flu. It was all the rage for a while, but then, as with many health food fads, faded from mass market view. Preserved vegetables, however, are very healthy, indeed. They contain vitamins and fiber and also happy, healthy bacteria that's great for your digestion and general gut health. A healthy gut is important for your general health and immune system. The typical American diet is a gut-buster in more ways than one! Here's a good background article, but I'm going to focus on the way I make fermented vegetables. The easiest, cheapest way I found to ferment vegetables I found in a wonderful book by Sally Fallon called Nourishing Traditions.

Kimchi Tools

These are my basic kimchi/sauerkraut-making tools. Nothing fancy or expensive. If I ever have money to burn, I may get one of these, but my $3 craft store bowl and plastic potato masher work just fine for me!  I used small, new canning jars for this batch, because I plan to give these away, but I also use repurposed jars that were around. Fermenting isn't as fussy as canning, so the jars need to be clean, but not fresh from boiling water!
Ingredients


These are the basic kimchi ingredients:
  • one medium head of Napa cabbage (I like to use organic wherever possible) 
  • one bunch green onions
  • one tablespoon grated ginger
  • one cup grated carrot
  • 3 cloves garlic minced
  • 1/2 tsp red pepper (or more, if you like it hot)
  • 1 tablespoons sea salt
  • 4 tablespoons whey, if using, otherwise, add another tablespoon salt
A note about whey: Whey is a dairy product that accelerates the lacto-fermentation process. I make mine by draining whole, plain yogurt in a tea towel. If you have plain yogurt, you may have enough whey on top of your yogurt if you've had it a couple days. I use it also for soaking grains, so I make a batch of it. More on that another time! This is what it looks like. It keeps in the fridge a long time!


Whey

The first step is to shred the veggies. I like to use a knife for Napa cabbage and a mandolin for green cabbage. Napa cabbage I find too big for my mandolin. I have a lovely Chinese knife that was a gift from a friend, so I use that, but any large knife will do. Make your slices as thin as possible.

Napa cabbage varies in size, so I usually fill this bowl. Next, I grate the carrot using a box grater and for the ginger, I use a microplaner.  Feel free to peel your ginger, I don't.
Shredded Cabbage
 
Grated Ginger


Ready to Pound

Chop the green onions and garlic, sprinkle on the salt, red pepper and whey (if using) and toss everything in the bowl together. Now comes the fun part! The vegetables  need to be pounded to start them releasing their juices. You're not mashing them into a pulp, just whacking at them for about 10 minutes. I usually set my kitchen timer for 10 minutes and start pounding.
After 4 minutes of pounding
After 7 minutes of pounding
After 10 minutes of pounding


Packing into Jars

The kimchi is now ready to pack into jars. I place some into the jars and pack in tight with a wooden pestle from a Japanese grinding bowl I have around. Use whatever you have, but you want to pack the veggies down, so the liquid come up to the top of the veggies.

Finished Jars

WARNING: Be sure to leave about an inch of head space on top of your jars. Pressure from the fermentation will build up, otherwise, and cause your jars to start leaking (don't ask how I know this!). 

In the Pantry

After screwing on the lids tightly, I put them in my pantry for 3-4 days (shown here with a batch of sauerkraut made the same day), then transfer to the fridge. You can eat it after 4 days, but it gets better as it ages and will keep for months, if it lasts that long. I eat a bit usually every day!

Finished Kimchi


The recipe for sauerkraut is made the same way, and contains:
  • one head green cabbage
  • 1 tablespoon sea salt
  • 4 tabelspoons whey, or an additional tablespoon salt
  • 1 tablespoon caraway seed (I use less for a less strong caraway taste)
Pound and pack into jars the same as for kimchi.
Enjoy some kimchi on scrambled eggs, or with rice and fish. We like rice, fish, eggs and kimchi for breakfast! Gets your day off to a great start!

Wednesday, August 18, 2010

Finished!

 She's all done, except for her base. I may finish the piece of wood she's on and use that, or I may do something else. I don't want to call attention to it, whatever it is. I'm happy with how it came out, though it was a learning process to me sure! Her ruffles are the same printed organza that's on her bodice and underskirt. It was a fun project and I'll try it again, especially since I bought a pasta roller just for this purpose!
 
 The 'fabric" on her dress is self-printed organza bonded to a sheet of sculpey. Takes a little getting used to. The next one will be better!
I baked two tiny spheres to use as her eyeballs. It was easier to get the eyes somewhat even. I've never used glass eyes, partly because They can be pricey and partly because I like painting eyes!


For those of you wondering where the Godmother and Godfather are, they're coming along! I added sculpey hair. She got chopsticks or knitting needles and he got a lovely tiara! Now to dress them! 

Wednesday, August 11, 2010

Progress


Here's some newer pics. Her head was reworked and reattached. I like her expression. At first, she was looking like some kind of harlequin, but I wasn't really liking it. Now her hair is more of the period and she has a more youthful expression. Now for hands and finishing and baking. Then, I'll detail paint and embellish with some lacy bits and maybe a ruffle around her neck.

Tuesday, August 10, 2010

New Technique

I've been playing around with something I gleaned from looking at the wonderful work of The Filigree (http://www.etsy.com/shop/thefiligree?ref=seller_info). I love the overall pattern on some of the pieces and especially as a pattern on the clothing of figures. I thought it would be a fun addition to some of my figures. I pored over the pictures, trying to figure out if it was fabric on polymer clay, or painted. My friend Ang suggested I ask the artist. Der! I sent a message to the artist, who confirmed that it was indeed fabric. He didn't send me a tutorial, but I didn't expect that. If you asked me how I sculpted my pieces, I couldn't tell you in a paragraph. It takes practice and experience, so I forged ahead! Here's some pictures of this piece in progress. I'm having fun with it. Please ignore the hands, arms and face. I'm not happy with them, but since now she has this cute little Watteau dress, I have a clearer idea of who she is and can rework her. This piece may come out a bit overworked, but I think she'll be fun.

Here's the beginning. I drilled a hole in a piece of wood and make an armature with an extension on it that would go in the hole, so she'd stand on her own. Then, I roughed out some shape in foil. I wanted a demure little hip shift, which is why the right leg looks odd in this pic.


Here's the start of her head and legs.


This is a photo I found on the internet. It's a piece of antique lace. I played with the color in Photoshop, tiled it and printed it on a piece of silk organza. I love making my own fabrics!


Here she is, starting to have her fabrics on. The check is another image from the internet recolored and manipulated and printed on organza.


Another view. There's going to be some real fabric lace on there when she's done. I have her Watteau back done and it's pretty cool, but the camera battery ran down! You'll have to wait until later to see it! 


For those of you wondering what a Watteau back is, it's a style popular in the 18th century. It's named after Jean-Antoine Watteau, a French painter of the period who painted a lot of wealthy fashionable people. Here's an example:
It's not a cape, but rather a train that is one piece with the skirt, but attaches at the back of the neckline. There's your costume history lesson for the day!


In other news, these silly guys are coming along! Can't wait to get them dressed!