Wednesday, August 18, 2010

Finished!

 She's all done, except for her base. I may finish the piece of wood she's on and use that, or I may do something else. I don't want to call attention to it, whatever it is. I'm happy with how it came out, though it was a learning process to me sure! Her ruffles are the same printed organza that's on her bodice and underskirt. It was a fun project and I'll try it again, especially since I bought a pasta roller just for this purpose!
 
 The 'fabric" on her dress is self-printed organza bonded to a sheet of sculpey. Takes a little getting used to. The next one will be better!
I baked two tiny spheres to use as her eyeballs. It was easier to get the eyes somewhat even. I've never used glass eyes, partly because They can be pricey and partly because I like painting eyes!


For those of you wondering where the Godmother and Godfather are, they're coming along! I added sculpey hair. She got chopsticks or knitting needles and he got a lovely tiara! Now to dress them! 

Wednesday, August 11, 2010

Progress


Here's some newer pics. Her head was reworked and reattached. I like her expression. At first, she was looking like some kind of harlequin, but I wasn't really liking it. Now her hair is more of the period and she has a more youthful expression. Now for hands and finishing and baking. Then, I'll detail paint and embellish with some lacy bits and maybe a ruffle around her neck.

Tuesday, August 10, 2010

New Technique

I've been playing around with something I gleaned from looking at the wonderful work of The Filigree (http://www.etsy.com/shop/thefiligree?ref=seller_info). I love the overall pattern on some of the pieces and especially as a pattern on the clothing of figures. I thought it would be a fun addition to some of my figures. I pored over the pictures, trying to figure out if it was fabric on polymer clay, or painted. My friend Ang suggested I ask the artist. Der! I sent a message to the artist, who confirmed that it was indeed fabric. He didn't send me a tutorial, but I didn't expect that. If you asked me how I sculpted my pieces, I couldn't tell you in a paragraph. It takes practice and experience, so I forged ahead! Here's some pictures of this piece in progress. I'm having fun with it. Please ignore the hands, arms and face. I'm not happy with them, but since now she has this cute little Watteau dress, I have a clearer idea of who she is and can rework her. This piece may come out a bit overworked, but I think she'll be fun.

Here's the beginning. I drilled a hole in a piece of wood and make an armature with an extension on it that would go in the hole, so she'd stand on her own. Then, I roughed out some shape in foil. I wanted a demure little hip shift, which is why the right leg looks odd in this pic.


Here's the start of her head and legs.


This is a photo I found on the internet. It's a piece of antique lace. I played with the color in Photoshop, tiled it and printed it on a piece of silk organza. I love making my own fabrics!


Here she is, starting to have her fabrics on. The check is another image from the internet recolored and manipulated and printed on organza.


Another view. There's going to be some real fabric lace on there when she's done. I have her Watteau back done and it's pretty cool, but the camera battery ran down! You'll have to wait until later to see it! 


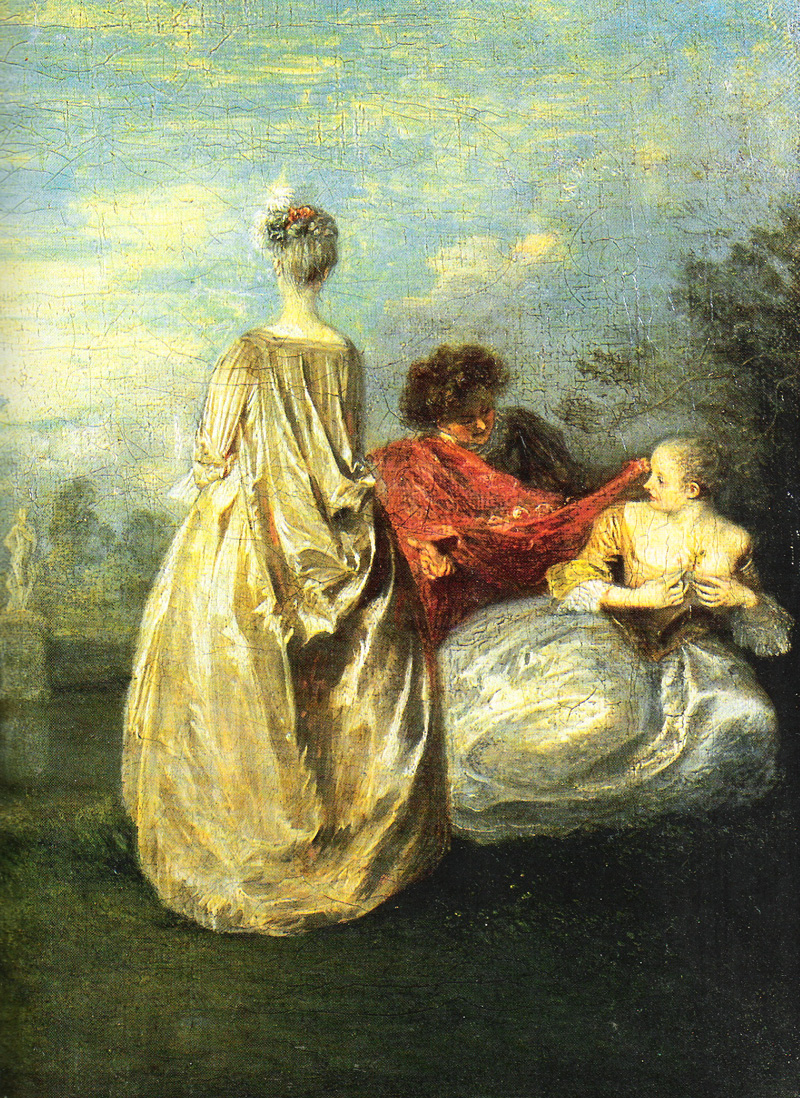
For those of you wondering what a Watteau back is, it's a style popular in the 18th century. It's named after Jean-Antoine Watteau, a French painter of the period who painted a lot of wealthy fashionable people. Here's an example:
It's not a cape, but rather a train that is one piece with the skirt, but attaches at the back of the neckline. There's your costume history lesson for the day!


In other news, these silly guys are coming along! Can't wait to get them dressed!

Tuesday, July 20, 2010

Finally!!

I finally got the Etsy site redone and the widget on the blog! I don't know why this is so painful! Hopefully, I'll get used to it!

Misfit Fairies

Here's the little guy who broke his head off. I wrapped him in a piece of crinkled gold silk. There's a brass tip with an attached loop. Pretty cute!


This is the start of the Fairy Godmother and Fairy Godfather. They'll both have nice fluffy dresses. I always wanted to do a fairy in drag! I seriously have to take some time out to revamp my Etsy site. Seriously! I don't know what's keeping me.

Dream Fairy Numero Dos

 After struggling with the beeswax (it was stickier and thicker than the paraffin) I got this one finished. It sure smells nice! I suppose I should work on my etsy site.

Monday, July 19, 2010

The Perfect Chair!!

I've been wanting a good chair for my worktable. I like being up higher, partly because I'm tall-ish and partly just because I like it. I thought a barstool would work, so I've been keeping my eyes open for one. I found this one today at a thrift store. It's solid pine, very sturdy and heavy. It's just the right height and was only 8 bucks!!! The room is coming together bit by bit.

Third Imp's the Charm!

I had a couple disasters with the poor little imp. The first one, the one in the previous photos, fell and broke his head off! (oh, no!) I made another one in a dark-ish brown, but when I baked him, his nose got a bit burned! (oh, no!) This is the third one and I'm happy with him! I'll try to put the other two little gimp imps on something sometime!  It's almost done, except for gluing the little guy on there and letting the tail dry and painting it. I realized camels should have tails, so I added one this morning. Thanks to Ang for the suggestion of the color pink!

Thursday, July 15, 2010

Progress

I think the sculpting is done on this guy. Now to wait until the came dries and paint it! And no, I have no idea what color!

Wednesday, July 14, 2010

Wax On!

This is what happens when the fabric is coated with wax, then "sculpted." I LOVE it! The wax does great things to the scupley, too! Can't wait to do another one! I'm thinking of having some have banners with sayings on them. Maybe in latin. The next one is cooling now. The sculpting is much better.. oh, and it's green!

Tuesday, July 13, 2010

New Piece


This is a new piece. I think I posted pics of the little armatures. This piece is only 6" long! Her limbs and head are painted super sculpy. She has a wire armature that is flexible and a wire loop to hang her by. Her undergarment (she is wrapped with batting, then fabric) and dress are a cream silk/hemp blend fabric. The piece of lace over the top is an ancient piece of lace with gold thread. I'm thinking $40 including shipping. Let me know if you want her before I post her to etsy. Also let me know if I'm out of my mind on the price in either direction!

Fire Sale!!!


Since I've started making things again, I'd like to clear out some of the old pieces that have been cluttering up my space! If you're interested in any of these guys, let me know. I may post them on etsy later, but thought I'd post them here, first.

The one above  is The Would-Be Gentlemen. He's a character from a Moliere play. He dresses up in what he thinks is haute couture, only to find himself looking like a fool. This is one of the most ridiculous eras in men's fashion. He is almost 18" tall, bedecked with silk, and antique lace.


This one, I call The Count. This 17th century dandy is an experiment in monochrome. I dyed and/or painted his fabrics. He is about 17" tall. I'd take $200 obo for this one.


This is the Rose Warrior. His story is that he was one of the most powerful knights in the land and when he heard there was an enchanted princess, he had to try his luck, even though all others had failed. He reached the thorny rose hedge that surrounded the castle and heard the most beautiful singing. This spurred his to start hacking away at the brambles. Little did he know the enchanted princess was the rose hedge and he had destroyed her. He spent the rest of his days tending the rose hedge, bringing it back to life, bit by bit. In old age, he dies in the arms of the hedge, now become a spirit, who takes him away, but not before he hears her beautiful voice and looks into her eyes.

This one features hand-tooled leather pieces and silk garments. If you have a soft spot for this piece, let me know. I mostly want to find him a home.


If you're interested in any of these pieces, let me know. The first two, I'd like to get ~$200 for, the last one, ~$150. Prices may be negotiable and might barter for these guys. It's time they (and I) moved on!

Sunday, July 11, 2010

Finished!


Well, he's finally done! I hope you enjoyed his progress. I am very pleased with the result. I'm pretty happy with the photos. I had to do some fill on the background in Photoshop, and will need to get a bigger paper for next time.

I felt like I was using muscles I hadn't used in a while, but it was like riding a bicycle. The input and support of those following along was very helpful. Thanks to Stacie for kicking my butt and making me start and of course to Gin for purchasing him!

I already have an idea for another one. It will be the same basic size, and based on a costume rendering I did in grad school mumble-many years ago. A 17th century shepherdess wannabe, only she's a hippo!


Thanks to Ang and/or Gin for the monocle idea and thanks to Ken for the donation of the little lion fob! Now, if I can just figure out how to format better in Blogger!

Friday, July 9, 2010

Costuming


I've had these very old kid gloves that are way too tiny for anyone but a baby to wear, but they had these cute little buttons and buttonholes on them. I decided to make them the spats. Why waste those tiny buttonholes!


Costuming is always tricky for smaller pieces. You have to think about scale and thickness of the fabrics. Because I'm such a pose Nazi, and my hands and heet tend to be large and spread out, I often have to sew a lot of the clothes on the dolls by hand.I found the perfect piece of velveteen, but have to be careful not to make everything too thick! Here he is with his pants on!


Here he is almost done. Because of the velveteen, I ended up sewing the coat by hand. It's lined with silk. The first one I tried by machine and it was a disaster of crawly nastiness. Like herding cats! If you've sewn with velvets before, you know what I'm talking about. If you've never sewn with velvet, don't!!

He has a barely visibly silk shirt and a lace ruffle. I had a heck of a time with the sash and almost abandoned the fabric, but I just love it so much for him, I stuck it out. Of course, he'll have sleeves, but tomorrow!


Almost done! He needs a couple last things, aside from his sleeves. I'll post pictures when he's completed! And guess what?! He's sold!! My dear friend Ginni wants to buy him! I'm so pleased! I'm going to get a shelf to put my boxes on and a stool to sit on, then I'm going to blow the rest on my birthday! Whoooooo!!!!

Thursday, July 8, 2010

All Coiffed!


Well, his hair is done! I only used a small portion of the fur that was on the old hat I salvaged! I got the tail painted and the fur tip on. He's getting there! I'm glad I decided to put the fur on before I started his outfit. He sure does not need a lot of detail on his collar, since half his chest is covered in hair! I'll start costuming tomorrow.

In other news, I made a little impish thing for the back of the camel. Once it's painted, I'll glue it facing more front. Right now, it needs the hand to support its position. I had made some of these littly guys a few years ago and wanted to make molds of them and cast them, but I'm just not so good at the manufacturing process, so I think I'll just make them OOAK!


So, since I was on a Sculpey roll, I started making one of the armatures into something.  This one will be painted and costumed in white tones with scraps and bits of things. It will either be set on something or it will hang. I'm thinking it will be flying.

So, that's what I did today!